10.1 touch display on Verdin iMX8M Plus

All,

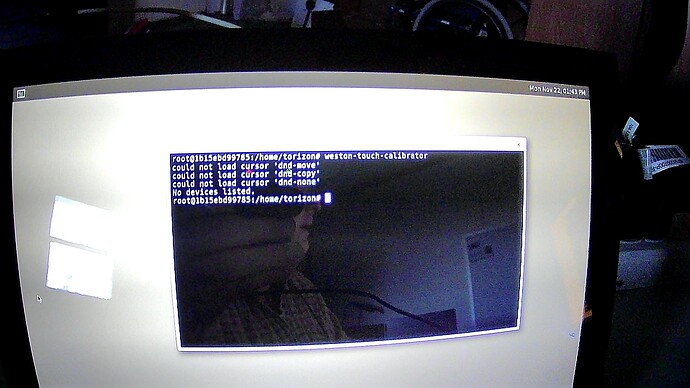
I poked around and pieced together the information necessary for getting the 10.1 inch Toradex touchscreen to actually display via LVDS. The “touch” portion of it no-worky though.

I have the Torizon container installed from EasyInstaller and then I SSH’ed in to hack the overlays.txt file.

cd /

cd sysroot

cd boot

cd ostree

cd torizon hit the TAB key here to fill in the name then hit return

cd dtb

sudo nano overlays.txt

I erased what was there and pasted in the following:
fdt_overlays=touch-atmel-mxt_overlay.dtbo verdin-imx8mp_sn65dsi84-lt170410_overlay.dtbo verdin-imx8mp_sn65dsi84_overlay.dtbo

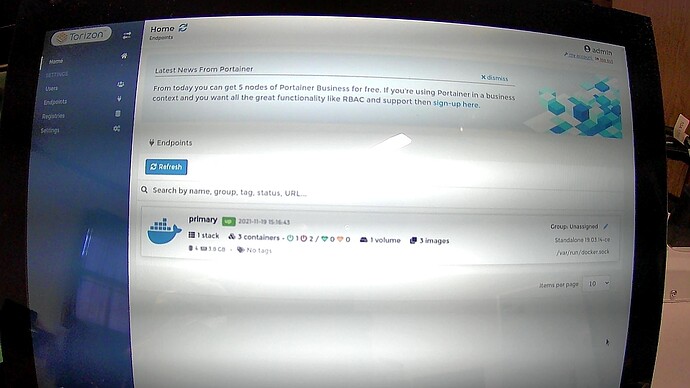
I exited and saved. I touched the reset button and watched things reboot. Even logged in as admin.

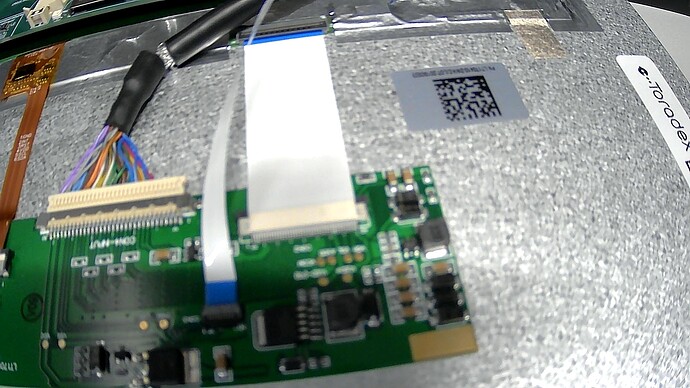
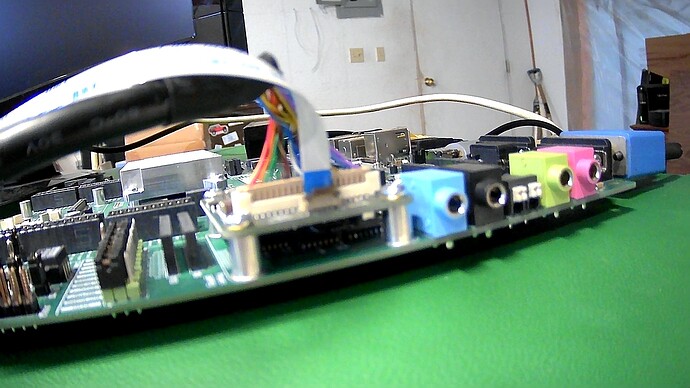
I suspect this is a cabling issue but didn’t want to go changing things and risk making magic smoke. Do these connections look correct for that tiny ribbon cable?


It’s sooooo thin I believe it could have went in backwards.

If the cabling is correct, how do I fix the touch screen?

I have not booted without the mouse connected. Is this one of those touchscreen drivers that cannot load if a mouse is connected? Seem to be quite a few of them floating around.

Thanks,

Just to include more data. This morning I tried the instructions from here:

If the cables are correct, there appears to be some special sauce needed before this touchscreen will work as more than a screen.

Hi @seasoned_geek,

It seems that the driver isn’t properly communicating with the hardware, can you please share with us the output for the following commands?

dmesg | grep i2c
dmesg | grep atmel
i2cdetect -y -r 0
i2cdetect -y -r 1
i2cdetect -y -r 2
i2cdetect -y -r 3

If you can’t run the i2cdetect commands, please build a container installing just the i2ctools package.

Please let me know if you need more information.

Best regards,
Daniel Morais

verdin-imx8mp-06848973:~$ dmesg | grep i2c
[    1.321113] i2c /dev entries driver
[    1.451537] i2c i2c-0: IMX I2C adapter registered
[    1.452439] i2c i2c-1: IMX I2C adapter registered
[    1.453246] i2c i2c-2: IMX I2C adapter registered
[    1.543685] i2c i2c-3: IMX I2C adapter registered
[    6.329765] atmel_mxt_ts 3-004a: __mxt_read_reg: i2c transfer failed (-6)
[    6.388983] atmel_mxt_ts 3-004a: mxt_bootloader_read: i2c recv failed (-6)
[    6.639865] atmel_mxt_ts 3-004a: mxt_bootloader_read: i2c recv failed (-6)
verdin-imx8mp-06848973:~$ dmesg | grep atmel
[    6.329765] atmel_mxt_ts 3-004a: __mxt_read_reg: i2c transfer failed (-6)
[    6.388983] atmel_mxt_ts 3-004a: mxt_bootloader_read: i2c recv failed (-6)
[    6.639627] atmel_mxt_ts 3-004a: Trying alternate bootloader address
[    6.639865] atmel_mxt_ts 3-004a: mxt_bootloader_read: i2c recv failed (-6)
verdin-imx8mp-06848973:~$

Just to be clear for those who stumble on this, it is i2c-tools not i2ctools

developer@-developer-VirtualBox:~/Projects/i2ctools$ cat Dockerfile
FROM --platform=linux/arm64/v8 torizon/debian:2-bullseye

RUN apt update && apt -y install i2c-tools

docker build --pull -t seasonedgeek/i2ctools_container .
docker push seasonedgeek/i2ctools_container

On target
docker stop $(docker ps -a -q)
docker pull seasonedgeek/i2ctools_container

docker run --rm -it -v /tmp:/tmp -v /var/run/dbus:/var/run/dbus -v /dev/galcore:/dev/galcore --device-cgroup-rule=‘c 199:* rmw’ seasonedgeek/i2ctools_container

root@cd30de8a7628:/# i2cdectect -y -r 0
bash: i2cdectect: command not found
root@cd30de8a7628:/# 
root@cd30de8a7628:/# i2cdectect -y -r 1
bash: i2cdectect: command not found
root@cd30de8a7628:/# i2cdectect -y -r 2
bash: i2cdectect: command not found
root@cd30de8a7628:/# i2cdectect -y -r 3
bash: i2cdectect: command not found
root@cd30de8a7628:/#

Back to look at build I find this at the very end.

Setting up perl (5.32.1-4+deb11u2) ...
Setting up i2c-tools (4.2-1+b1) ...
Failed to send reload request: No such file or directory
Failed to write 'change' to '/sys/devices/pci0000:00/0000:00:07.0/i2c-0/i2c-dev/i2c-0/uevent': Read-only file system
Processing triggers for libc-bin (2.31-13+deb11u2) ...
Removing intermediate container 2b41d7a4c7ea
 ---> 085a5cf9a5c3
Successfully built 085a5cf9a5c3
Successfully tagged seasonedgeek/i2ctools_container:latest

The tools you wish me to use cannot be installed in a Docker built container

Back on target

One last try

root@cd30de8a7628:/# apt -y install i2c-tools
Reading package lists... Done
Building dependency tree... Done
Reading state information... Done
i2c-tools is already the newest version (4.2-1+b1).
0 upgraded, 0 newly installed, 0 to remove and 0 not upgraded.
root@cd30de8a7628:/#
docker stop $(docker ps -a -q)
docker run --rm -it -v /tmp:/tmp -v /var/run/dbus:/var/run/dbus -v /dev/galcore:/dev/galcore --device-cgroup-rule='c 199:* rmw' torizon/debian:2-bullseye

apt update
apt -y install i2c-tools

Exact same failure

Setting up perl (5.32.1-4+deb11u2) ...
Setting up i2c-tools (4.2-1+b1) ...
Failed to send reload request: No such file or directory
Failed to write 'change' to '/sys/devices/platform/soc@0/30800000.bus/30a20000.i2c/i2c-0/i2c-dev/i2c-0/uevent': Read-only file system
Processing triggers for libc-bin (2.31-13+deb11u2) ...
root@0f940928fc04:/# i2cdectect -y -r 0
bash: i2cdectect: command not found
root@0f940928fc04:/#
Hi @seasoned_geek ,

The error -6 indicates that the hardware isn’t being detected.

Can you make sure that the flat cable is correctly inserted? Also, please verify if pin 1 of the adapter is connected with pin 1 of the display.

About the commands, the correct should be i2cdetect instead of i2cdectect, can you please try again? These commands will display all the I2C registers and the devices connected to each channel, you should see the display at the register 4A.

Best regards,
Daniel Morais

I asked you about the cable and sent pictures!

I’m not a hardware guy and this came with zero instructions.

verdin-imx8mp-06848973:~$ i2cdetect -y -r 0
     0  1  2  3  4  5  6  7  8  9  a  b  c  d  e  f
00:          -- -- -- -- -- -- -- -- -- -- -- -- -- 
10: -- -- -- -- -- -- -- -- -- -- -- -- -- -- -- -- 
20: -- -- -- -- -- UU -- -- -- -- -- -- -- -- -- -- 
30: -- -- UU -- -- -- -- -- -- -- -- -- -- -- -- -- 
40: -- -- -- -- -- -- -- -- -- UU -- -- -- -- -- -- 
50: UU -- -- -- -- -- -- -- -- -- -- -- -- -- -- -- 
60: -- -- -- -- -- -- -- -- -- -- -- -- -- -- -- -- 
70: -- -- -- -- -- -- -- --                         

verdin-imx8mp-06848973:~$ i2cdetect -y -r 1
     0  1  2  3  4  5  6  7  8  9  a  b  c  d  e  f
00:          -- -- -- -- -- -- -- -- -- -- -- -- -- 
10: -- -- -- -- -- -- -- -- -- -- -- -- -- -- -- -- 
20: -- -- -- -- -- -- -- -- -- -- -- -- -- -- -- -- 
30: -- -- -- -- -- -- -- -- -- -- -- -- -- -- -- -- 
40: -- -- -- -- -- -- -- -- -- -- -- -- -- -- -- -- 
50: -- -- -- -- -- -- -- -- -- -- -- -- -- -- -- -- 
60: -- -- -- -- -- -- -- -- -- -- -- -- -- -- -- -- 
70: -- -- -- -- -- -- -- --                         

verdin-imx8mp-06848973:~$ i2cdetect -y -r 2
     0  1  2  3  4  5  6  7  8  9  a  b  c  d  e  f
00:          -- -- -- -- -- -- -- -- -- -- -- -- -- 
10: -- -- -- -- -- -- -- -- -- -- -- -- -- -- -- -- 
20: -- -- -- -- -- -- -- -- -- -- -- -- -- -- -- -- 
30: -- -- -- -- -- -- -- -- -- -- -- -- -- -- -- -- 
40: -- -- -- -- -- -- -- -- -- -- -- -- -- -- -- -- 
50: -- -- -- -- -- -- -- -- -- -- -- -- -- -- -- -- 
60: -- -- -- -- -- -- -- -- -- -- -- -- -- -- -- -- 
70: -- -- -- -- -- -- -- --                         

verdin-imx8mp-06848973:~$ i2cdetect -y -r 3
     0  1  2  3  4  5  6  7  8  9  a  b  c  d  e  f
00:          -- -- -- -- -- -- -- -- -- -- -- -- -- 
10: -- -- -- -- -- -- -- -- -- -- UU -- -- -- -- -- 
20: -- UU -- -- -- -- -- -- -- -- -- -- UU -- -- -- 
30: -- -- -- -- -- -- -- -- -- -- -- -- -- -- -- -- 
40: UU -- -- -- -- -- -- -- -- -- -- -- -- -- -- UU 
50: UU -- -- -- -- -- -- UU -- -- -- -- -- -- -- -- 
60: -- -- -- -- -- -- -- -- -- -- -- -- -- -- -- -- 
70: -- -- -- -- -- -- -- --                         

verdin-imx8mp-06848973:~$

Thanks for the outputs.

Check if the flat cable has the blue part on the same side, after this, you can check what is pin 1 of the display by checking this article and what is pin 1 on the adapter by checking a small white point near the connector.

I checked your photos but I can’t see the full way of the flat. If your flat has the blue part on the same side it should be correct.

It’s not. I can’t remember how to release the connection on the back of the display. Given the 30+ week lead time I don’t want to mess this up.

These things really should come with valid instructions. This link is looking up at useless hoping to one day get there.

No information about how to release the locks.

I called a hardware guy and have it fixed.